 18Aug
18Aug

Before diving into the testing procedures, it’s vital to understand the basics of your golf cart motor. Golf carts typically run on either a 36-volt or a 48-volt electric motor. These motors are powered by a series of batteries and can significantly differ based on the make and model of your cart, such as EZGO or E-Z-Go models.
Types of Golf Cart Motors
Golf cart motors primarily come in two types: series wound motors and separately excited motors. Series wound motors are known for their durability and are commonly used in older models. They provide consistent performance but lack speed variability. Separately excited motors, often found in newer models, offer better speed control and efficiency. Understanding which type you have is crucial for accurate testing and maintenance.
Voltage Specifications
The voltage of your golf cart motor is a critical factor in its operation. A 36-volt motor is typically used in older models and provides sufficient power for most recreational purposes. A 48-volt motor, on the other hand, is found in newer models and offers better torque and speed, making it suitable for more demanding terrains. Knowing your motor’s voltage helps in selecting the right testing equipment and procedures.

Importance of Regular Maintenance
Regular maintenance of your golf cart motor is essential to ensure its longevity and optimal performance. Without proper care, minor issues can escalate into major problems, leading to costly repairs or replacements. By understanding the basics of your golf cart motor and conducting regular inspections, you can identify potential issues early and take preventive measures to avoid breakdowns.
Why Test Your Golf Cart Motor?
Testing your golf cart motor is essential for several reasons. It helps identify potential issues before they escalate into costly repairs. Regular testing can extend the lifespan of your motor and ensure optimal performance. Additionally, troubleshooting can guide you in deciding whether a professional repair is necessary or if a simple fix will suffice.
Preventive Measures
Conducting regular tests on your golf cart motor acts as a preventive measure against unexpected failures. By identifying worn-out components or faulty connections early, you can address these issues before they affect the overall performance of your cart. Preventive testing not only saves you money in the long run but also ensures your safety on the course.
Cost-Effectiveness
Testing your golf cart motor can be a cost-effective strategy in maintaining your vehicle. By diagnosing problems early, you can avoid expensive repairs or replacements. Simple fixes, like replacing worn brushes or tightening loose connections, are far less costly than dealing with major motor failures. Regular testing ensures you get the best return on your investment in your golf cart.
Enhanced Performance
Regularly testing your golf cart motor helps maintain its peak performance. A well-maintained motor provides a smooth and reliable ride, enhancing your overall golfing experience. By keeping your motor in top condition, you can enjoy better speed, efficiency, and torque, allowing you to navigate the course with ease and confidence.

Tools You’ll Need
- Digital multimeter
- Wrench set
- Screwdriver
- Safety gloves
- Safety goggles
Ensure you have these tools ready before you begin. They will help you safely and accurately test your golf cart motor.
Digital Multimeter
A digital multimeter is an essential tool for testing your golf cart motor. It allows you to measure voltage, resistance, and continuity, which are critical in diagnosing electrical issues. Ensure your multimeter is in good working condition and set to the appropriate settings before use. Familiarize yourself with its functions to ensure accurate readings during the testing process.
Wrench Set and Screwdriver
A wrench set and screwdriver are necessary for disconnecting and reconnecting components during the testing process. These tools help you safely remove battery cables and access the motor for inspection. Make sure you have the right sizes for your specific golf cart model to prevent damage to the components.
Safety Gear
Safety gloves and goggles are vital to protect yourself from electrical hazards and debris during the testing process. Electrical components can pose risks such as shocks or sparks, so wearing proper safety gear is non-negotiable. Ensure your safety gloves are insulated and your goggles fit securely to provide adequate protection.
Step-by-Step Guide to Testing a Golf Cart Motor
1. Safety First
Safety should always be your priority when working with electrical components. Before starting, wear safety gloves and goggles. Ensure the golf cart is on a flat surface and the parking brake is engaged to prevent any accidental movement.
Preparing Your Workspace
Before you begin testing, ensure your workspace is clean and organized. Remove any clutter or obstacles that could pose a hazard during the testing process. A well-prepared workspace minimizes the risk of accidents and allows you to focus on the task at hand.
Understanding Electrical Hazards
Working with electrical components involves certain risks, including the potential for shocks and short circuits. Familiarize yourself with basic electrical safety principles, such as avoiding contact with live wires and ensuring all components are properly grounded. Taking these precautions can prevent accidents and ensure your safety.
Importance of Personal Protective Equipment (PPE)
Personal protective equipment (PPE) is essential when testing your golf cart motor. Insulated gloves protect your hands from electrical shocks, while safety goggles shield your eyes from debris. Wearing the appropriate PPE is a simple yet effective way to safeguard yourself during the testing process.
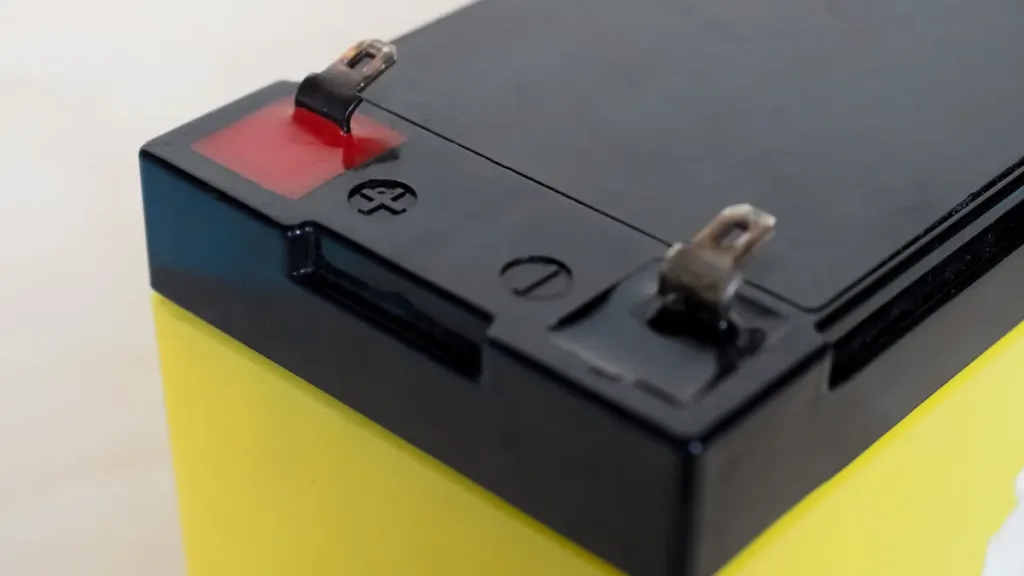
2. Disconnect the Batteries
To test the motor safely, disconnect the batteries. Use a wrench to remove the cables from the battery terminals. This step prevents any accidental electrical discharge during the testing process.
Proper Battery Disconnection
When disconnecting the batteries, always start with the negative terminal. This reduces the risk of short circuits and electrical shocks. Once the negative cable is disconnected, proceed to the positive terminal. Keep the cables away from the battery posts to prevent accidental reconnection during the testing process.
Storing Battery Cables Safely
After disconnecting the battery cables, secure them away from the battery and other components. Use cable ties or clips to keep them in place, ensuring they do not interfere with your work. Proper cable management prevents accidental reconnections and keeps your workspace organized.
Checking Battery Health
Before proceeding with motor testing, take a moment to inspect the overall condition of your batteries. Look for signs of corrosion, leaks, or swelling, which can indicate underlying issues. Healthy batteries are crucial for accurate testing results and the overall performance of your golf cart motor.
3. Locate the Motor
The motor is usually found at the rear of the golf cart. Depending on your golf cart’s model, you might need to remove some panels or covers to access it.
Identifying Motor Location
Consult your golf cart’s user manual to identify the exact location of the motor. Different models may have variations in motor placement, so understanding where your motor is located is crucial for efficient testing. Familiarize yourself with the layout of your specific model to streamline the testing process.
Removing Panels or Covers
If your golf cart motor is obscured by panels or covers, carefully remove them using the appropriate tools. Follow the manufacturer’s instructions to prevent damage to the components. Keep all screws and fasteners organized for easy reassembly after the testing is complete.
Ensuring Access to All Components
Once the motor is exposed, ensure you have clear access to all necessary components for testing. This includes the solenoid, motor brushes, and armature. Having unobstructed access allows for thorough inspections and accurate testing, ensuring no issues go unnoticed.
4. Test the Solenoid
The solenoid is a crucial component in your golf cart’s motor system. It acts as a switch, allowing power from the batteries to reach the motor. To test the solenoid:
- Reconnect the battery cables.
- Use the multimeter to check the voltage across the solenoid terminals.
- If the reading is within the expected range, the solenoid is functioning correctly.
Understanding Solenoid Function
The solenoid serves as a bridge between the battery and the motor, controlling the flow of electricity. A functioning solenoid ensures that power is delivered efficiently and reliably. Understanding its role is essential for diagnosing issues related to power delivery in your golf cart.
Performing Voltage Tests
When testing the solenoid, ensure your multimeter is set to the correct voltage range. Attach the probes to the solenoid terminals and observe the reading. A healthy solenoid should show a voltage close to the battery’s output when engaged. Deviations from this range may indicate a faulty solenoid that requires attention.
Addressing Solenoid Issues
If the solenoid test reveals irregular voltage readings, consider further troubleshooting or replacement. Check for loose connections or signs of wear, which may affect its performance. Addressing solenoid issues promptly can prevent power delivery problems and ensure your motor operates smoothly.
5. Inspect the Motor Brushes
Motor brushes are small components inside the motor that conduct electricity. Worn brushes can lead to poor motor performance. To inspect them:
- Remove the motor cover.
- Check for wear and tear on the brushes.
- Replace them if they appear worn.
Role of Motor Brushes
Motor brushes play a critical role in conducting electricity between stationary wires and moving parts of the motor. Their condition directly impacts the motor’s efficiency and performance. Understanding their function is key to diagnosing issues related to power transmission within the motor.
Identifying Brush Wear
When inspecting motor brushes, look for signs of wear such as uneven surfaces, cracks, or excessive shortening. Worn brushes can cause poor electrical contact, leading to reduced motor performance. Identifying these issues early allows for timely replacement and maintenance.
Replacing Worn Brushes
If you determine that the motor brushes are worn, replace them with new ones that match your motor’s specifications. Follow the manufacturer’s guidelines for installation to ensure proper fit and function. Regular replacement of worn brushes is an essential part of maintaining your golf cart motor’s performance.
6. Test the Motor Armature
The armature is another critical part of the motor. It should be tested for continuity using a multimeter. To do this:
- Set the multimeter to measure resistance (ohms).
- Touch the probes to the armature terminals.
- A low resistance reading indicates a functional armature.
Understanding Armature Function
The armature is a rotating component that works with the magnetic field to produce motion in the motor. Its condition is vital for the motor’s overall functionality. Understanding how the armature operates helps in diagnosing performance issues related to the motor’s rotational components.
Conducting Resistance Tests
When testing the armature, ensure your multimeter is calibrated correctly. A low resistance reading indicates that the armature’s windings are intact and functional. High resistance or infinite readings may suggest a break in the windings, requiring further inspection or replacement.
Addressing Armature Issues
If the armature test reveals abnormalities, consider seeking professional assistance for repair or replacement. Armature issues can be complex and may involve intricate repairs. Addressing these issues promptly prevents further damage and ensures your golf cart motor operates efficiently.
7. Check Connections and Wiring
Inspect all wires and connections for signs of damage or corrosion. Loose or corroded connections can lead to motor issues. Tighten any loose connections and clean any corrosion with a suitable cleaner.
Identifying Wiring Issues
Carefully examine all wiring and connections for signs of fraying, exposed wires, or corrosion. Damaged wiring can interrupt the electrical flow, affecting the motor’s performance. Identifying these issues early allows for timely repairs and prevents further damage to your golf cart’s electrical system.
Securing Loose Connections
Loose connections can lead to intermittent power delivery, causing performance issues in your golf cart motor. Use a wrench or screwdriver to tighten any loose terminals or connectors. Ensuring all connections are secure helps maintain consistent power flow and reliable motor operation.
Cleaning Corroded Components
If you encounter corrosion on battery terminals or connectors, use a suitable cleaner to remove it. Corrosion can impede electrical contact, leading to power delivery problems. Regular cleaning and maintenance of connections prevent corrosion buildup and ensure optimal motor performance.
Testing Specific Golf Cart Models
How to Test a 36 Volt Golf Cart Motor
- Ensure the battery pack is fully charged.
- Follow the steps outlined above, paying particular attention to the voltage readings. The multimeter should read around 36 volts when testing components.
Voltage Specifics for 36 Volt Motors
Understanding the voltage specifics for 36-volt motors is essential for accurate testing. These motors are designed to operate within a certain voltage range, so deviations can indicate underlying issues. Ensure your multimeter is calibrated to measure within this range to obtain precise readings.
Common Issues in 36 Volt Motors
36-volt motors may encounter common issues such as reduced power or speed, often due to battery or connection problems. Regular testing helps identify these issues early, allowing for timely interventions. Addressing these common problems ensures your motor operates at its full potential.
Maintenance Tips for 36 Volt Motors
Regular maintenance of 36-volt motors involves routine inspections of batteries, connections, and components. Keeping these elements in optimal condition prevents performance issues and extends the motor’s lifespan. Following maintenance guidelines specific to 36-volt motors ensures reliable operation.
How to Test a 48 Volt Golf Cart Motor
- Similar to testing a 36-volt motor, ensure the battery is fully charged.
- Test all components using the multimeter, expecting readings around 48 volts.
Voltage Specifics for 48 Volt Motors
48-volt motors require specific voltage readings to operate efficiently. These motors offer enhanced power and torque, making accurate testing crucial for maintaining performance. Familiarize yourself with the voltage specifications to ensure your multimeter provides accurate readings during testing.
Common Issues in 48 Volt Motors
48-volt motors may experience issues such as overheating or reduced efficiency, often linked to battery or component malfunctions. Regular testing helps identify these issues, allowing for proactive maintenance. Addressing these common problems ensures your motor delivers optimal performance.
Maintenance Tips for 48 Volt Motors
Maintaining a 48-volt motor involves regular checks of the battery system, wiring, and key components. Following a consistent maintenance schedule prevents potential issues and extends the motor’s lifespan. Adhering to these guidelines ensures your 48-volt motor remains reliable and efficient.
Testing an EZGO Golf Cart Motor
EZGO or E-Z-Go golf carts are popular models that might require specific attention. Always refer to the user manual for any model-specific instructions or troubleshooting tips.
Understanding EZGO Motor Specifications
EZGO golf carts have specific motor specifications that may differ from other models. Familiarize yourself with these specifications to ensure accurate testing and maintenance. Understanding your EZGO motor’s unique features helps diagnose issues effectively.
Common EZGO Motor Issues
EZGO motors may encounter issues such as sluggish performance or electrical malfunctions. Regular testing and maintenance help identify these issues early, allowing for timely repairs. Addressing these common problems ensures your EZGO motor operates smoothly and efficiently.
EZGO Maintenance Guidelines
Following the manufacturer’s maintenance guidelines for EZGO motors is crucial for optimal performance. Regular inspections, testing, and component replacements keep your motor in peak condition. Adhering to these guidelines ensures your EZGO golf cart remains reliable and efficient.
Frequently Asked Questions (FAQs)
How often should I test my golf cart motor?
It’s advisable to test your golf cart motor at least once a year or whenever you notice performance issues.
Recommended Testing Frequency
Regular testing of your golf cart motor helps maintain its performance and longevity. Testing at least once a year is recommended, but more frequent checks may be necessary if you use your cart frequently or notice changes in performance. Consistent testing ensures any issues are identified and addressed promptly.
Signs Indicating the Need for Testing
Certain signs, such as unusual noises, reduced speed, or inconsistent power, may indicate the need for immediate testing. Paying attention to these warning signs allows you to address potential issues before they escalate. Regular testing helps you stay proactive in maintaining your golf cart motor.
Benefits of Regular Testing
Regular testing of your golf cart motor provides numerous benefits, including enhanced performance, extended lifespan, and cost savings. By identifying and addressing issues early, you prevent major breakdowns and ensure your cart operates efficiently. Regular maintenance and testing contribute to a smooth and enjoyable golfing experience.
Can I test my golf cart motor without a multimeter?
While a multimeter is crucial for accurate testing, you can perform a basic inspection of components like the solenoid and wiring visually. However, for voltage and resistance testing, a multimeter is necessary.
Limitations of Visual Inspections
Visual inspections can help identify obvious issues, such as loose connections or visible wear, but they cannot provide detailed information about electrical performance. A multimeter is necessary to measure voltage and resistance accurately, which are crucial for diagnosing electrical issues. Combining visual inspections with multimeter testing ensures comprehensive maintenance.
Importance of Accurate Measurements
Accurate measurements of voltage and resistance are vital for diagnosing motor issues. A multimeter provides the precision needed to identify electrical problems, such as faulty solenoids or armature issues. Investing in a quality multimeter ensures reliable testing results and effective maintenance of your golf cart motor.
Combining Visual and Multimeter Testing
For the best results, combine visual inspections with multimeter testing. This comprehensive approach ensures you identify both visible and hidden issues, allowing for thorough maintenance. By using both methods, you maintain your golf cart motor’s performance and prolong its lifespan.
What should I do if I find a problem during testing?
If you identify a problem during testing, such as worn brushes or faulty wiring, replace the components if possible. For complex issues, it’s best to consult a professional.
Addressing Identified Issues
Once you identify a problem during testing, take appropriate action to address it. Replace worn or damaged components, such as brushes or wiring, to restore the motor’s functionality. Timely interventions prevent further damage and ensure your golf cart operates efficiently.
Knowing When to Seek Professional Help
Some issues, such as complex electrical malfunctions or significant motor damage, may require professional assistance. Recognize your limitations and consult a qualified technician when necessary. Professional repairs ensure the problem is resolved correctly and prevent further complications.
Importance of Timely Repairs
Addressing identified issues promptly prevents them from escalating into major problems. Timely repairs maintain your golf cart motor’s performance and extend its lifespan. Regular testing and maintenance ensure your golf cart remains reliable and efficient on the course.
Conclusion
Testing your golf cart motor is an essential maintenance task that ensures longevity and optimal performance. By following the steps outlined above, you can confidently diagnose and address potential issues in your golf cart motor. Whether you own a 36-volt or a 48-volt model, regular testing and maintenance can prevent costly repairs and keep you rolling smoothly on the course.
Empowerment Through Knowledge
By understanding the nuances of golf cart motor testing, you empower yourself to maintain your vehicle in peak condition. Knowledge of testing procedures and maintenance strategies allows you to take control of your golf cart’s performance and reliability. Empowered maintenance leads to a smoother and more enjoyable golfing experience.
Ensuring Enjoyable Golfing Experiences
Regular testing and maintenance of your golf cart motor contribute to an enjoyable golfing experience. A well-maintained motor provides reliable performance, allowing you to focus on your game. By keeping your golf cart in top condition, you ensure every round of golf is as enjoyable as the last.
Future-Proofing Your Golf Cart
Investing time in testing and maintaining your golf cart motor future-proofs your vehicle against potential issues. Regular care and attention extend the lifespan of your motor, ensuring it remains a reliable companion on the course. Future-proofing your golf cart guarantees continued enjoyment and performance for years to come.
For more information on golf cart maintenance and other golf-related tips, visit our blog. If you’re looking for high-quality golf training equipment, check out our Puttace Tour Grade Home Putting Mat


